When you suspect a leaking valve cover gasket, start by identifying signs like oil droplets, burning odors, or misfires. Early detection prevents costly repairs, engine damage, and environmental pollution. Gather necessary tools and materials, including a valve cover gasket kit and brake cleaner, which can be purchased for under $25. Remove the valve cover, inspect for wear, and replace the old gasket with a new one, applying silicone sealant correctly. Understanding common causes of leaks, like over-tightening or deteriorated gaskets, will help you prevent future issues. Now, prepare to dive deeper into the process to guarantee a leak-free seal.
Key Takeaways
- Identify visible signs of oil leaks, oil smells, and burning odors to detect a leaking valve cover gasket.
- Gather tools like a plastic putty knife and socket/ratchet set, and materials like a valve cover gasket kit and brake cleaner.
- Remove the valve cover bolts in a specific sequence, and inspect for signs of wear and oil leaks.
- Apply a continuous bead of RTV silicone sealant to the new gasket, and tighten bolts properly to ensure a leak-free seal.
- Regularly inspect and maintain the valve cover gasket to prevent leaks, and address any issues promptly to avoid costly repairs.
Identifying the Source of the Leak
While inspecting your engine, look for telltale signs of a leaking valve cover gasket. Catching the problem early can save you from more costly repairs down the road.
As you inspect, pay attention to visible signs of oil leaks around the valve cover area, such as oil puddles or drips. Don't forget to check for oil smells and burning odors, which can indicate a leaking valve cover gasket.
Misfires and performance issues may suggest oil leaking into spark plug tubes from a faulty gasket. Keep an eye on your oil levels, too – if you're finding yourself needing to top up frequently, it could be a sign of a valve cover gasket leak.
Gathering Essential Tools and Materials
Before you start fixing that leaking valve cover gasket, gather the necessary tools and materials you'll need to get the job done efficiently. Having the right tools and materials will save you time and frustration in the long run.
For this job, you'll need a few important tools, including a plastic putty knife, rubber mallet, socket/ratchet set, and torque wrench. Moreover, you'll need some brake cleaner to clean the area before replacing the gasket.
Concerning materials, you'll need a valve cover gasket kit and some Vulcanizing (RTV) sealant. Don't worry, these materials won't break the bank – the total cost of replacing a valve cover gasket on a four-cylinder engine is less than $25.
With your tools and materials in hand, you'll be ready to tackle the job, which should take about an hour to complete. Remember, having the right tools and materials is vital for a successful and efficient valve cover gasket replacement.
Understanding the Consequences of Leaks
If you disregard a leaking valve cover gasket, you're risking engine damage, potential fire hazards, and even environmental pollution. Oil leaking from the valve cover gasket can seep onto hot engine components, igniting a fire that can spread quickly.
Additionally, the leaked oil can accumulate on the ground, contaminating soil and water sources, and posing a threat to local ecosystems. Delaying repairs can result in increased repair costs and decreased engine efficiency, as the leak allows compression to escape, reducing engine performance.
Moreover, the leaked oil can create slippery surfaces, posing a safety risk to people and animals. By neglecting to address the leak, you're also compromising your vehicle's reliability and longevity.
It's essential to prioritize the repair of a leaking valve cover gasket to prevent these consequences and ensure your engine runs smoothly and efficiently.
Removing the Leaky Valve Cover
Now that you understand the importance of addressing a leaking valve cover gasket, it's time to remove the valve cover to access the old gasket. This step is vital in replacing the gasket and fixing the leak.
To begin, locate the bolts securing the valve cover and remove them in a specific sequence to avoid damaging the surrounding components. Be careful not to strip the bolts or apply excessive force, which can lead to further complications.
Once the bolts are removed, use a plastic putty knife to gently pry the valve cover off. Take your time, as the valve cover can be stuck due to the old gasket's adhesive properties. As you remove the valve cover, be cautious not to damage the surrounding components, such as the valve train or spark plug wires.
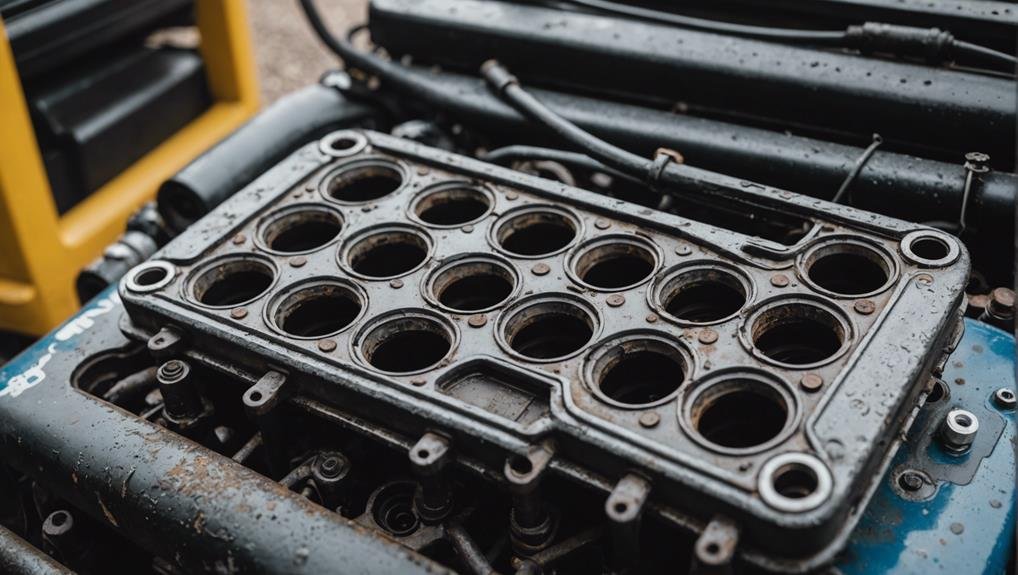
With the valve cover removed, you'll gain access to the old gasket, which is likely covered in silicone residue from the leak. Take note of the gasket's condition and any signs of wear on the valve cover before proceeding to the next step.
Inspecting the Valve Cover and Gasket

As you examine the removed valve cover and gasket, check the surface for visible signs of oil leaks, such as oil pooling around the edges or residue on the engine block and surrounding components. Verify for oil residue on the engine block and surrounding components as indicators of a leaking gasket. Look for signs of oil dripping onto the exhaust manifold, causing burning odors and smoke.
Make sure the valve cover bolts are secure and properly tightened to prevent leaks. Consider performing a dye test to pinpoint the exact location of the leak on the valve cover gasket.
Replacing the Old Gasket With a New One
Purchase a valve cover gasket kit that matches your vehicle's specifications, and gather the necessary tools, including a torque wrench, to guarantee a successful replacement. This kit should include the new gasket, along with any other components required for the job.
Before installing the new gasket, make sure to clean the valve cover surface thoroughly to prevent any dirt or debris from interfering with the seal. A clean surface is crucial to guarantee a leak-free seal. Next, remove any remaining residue from the old gasket, taking care not to scratch the surface.
Once the surface is clean, you're ready to install the new gasket. Apply a thin, even layer of silicone sealant to the gasket, making sure to follow the manufacturer's instructions. This will help create a secure seal between the gasket and the valve cover, preventing leaking oil and ensuring a proper seal.
With the new gasket in place, use your torque wrench to tighten the valve cover bolts to the specified torque, taking care not to overtighten or under-tighten.
Applying RTV Silicone Sealant Correctly

When applying RTV silicone sealant to the valve cover gasket, accuracy is key to creating a leak-proof seal. You'll want to make sure the surface is clean, dry, and free of oil or debris before applying the RTV silicone sealant. Use the correct type of RTV silicone sealant that's compatible with oil and high temperatures, as specified by the manufacturer. Apply the sealant in a continuous bead around the valve cover gasket mating surface, making sure to follow the manufacturer's instructions.
Proper application of RTV silicone sealant is vital to prevent oil leaks from the valve cover gasket. Allow the RTV silicone sealant to cure as per the manufacturer's instructions before starting the engine. This will establish a strong bond between the gasket and the valve cover, creating a leak-proof seal.
Common Causes of Valve Cover Leaks
You'll often find that valve cover leaks can be traced back to a handful of common culprits, including over-tightening, engine heat, poor maintenance, low-quality gaskets, and simple wear and tear over time. These factors can lead to a leak coming from your valve cover, causing frustration and concern.
Here are some common causes of valve cover leaks:
| Cause | Description |
|---|---|
| Over-tightening | Damaging the gasket with valve cover bolts |
| Engine Heat | Deteriorating the gasket over time |
| Poor Maintenance | Irregular oil changes leading to gasket failure |
| Low-quality Gaskets | Inferior materials prone to leaking |
| Wear and Tear | Gasket deterioration with years |
When it comes to maintaining your vehicle, an oil change is essential in preventing valve cover leaks. Moreover, using a high-quality silicone gasket can make a significant difference. By understanding these common causes, you'll be better equipped to identify and address the root of the issue, getting your vehicle back on the road in no time.
Preventing Future Leaks and Damage
To prevent future valve cover leaks and damage, start by making regular inspections of the valve cover gasket a habit, looking for signs of leaks, such as oil around the valve cover. These regular checks will help you catch any potential issues before they become major problems.
Here are some additional tips to help you prevent future leaks and damage:
- Use high-quality gaskets and sealants during replacement to guarantee a secure seal and prevent future leaks.
- Tighten valve cover bolts to the manufacturer's specified torque to avoid gasket damage.
- Monitor oil levels and consumption to detect any potential leaks early on.
- Consider performing engine flushing to prevent sludge buildup that can contribute to gasket failure.
Frequently Asked Questions
How Much Does It Cost to Repair a Valve Cover Gasket Leak?
You're wondering how much it'll set you back to fix a leaky valve cover gasket. Well, the good news is that the repair cost is usually under $25, making it a super affordable fix.
Will Stop Leak Work for Valve Cover Gasket?
You're wondering if stop leak will work for your valve cover gasket issue, but the truth is, it's not a reliable solution – it might provide temporary relief, but it won't properly fix the leak.
Can I Drive With a Leaking Valve Cover Gasket?
You shouldn't drive with a leaking valve cover gasket, as it can cause oil drips, misfires, and engine damage, leading to environmental pollution, safety hazards, and increased repair costs – it's not worth the risk.
What Is the Best Sealant for a Valve Cover Gasket?
When discussing sealants, you need something reliable. For a valve cover gasket, you'll want a high-quality Vulcanizing (RTV) sealant, known for its durability and heat resistance, ensuring a long-lasting seal and preventing oil leaks.
Conclusion
You've successfully fixed the leaking valve cover gasket, and your engine is now safeguarded from oil leaks and damage.
Remember to regularly inspect your valve cover and gasket to prevent future leaks. By following these steps, you've saved yourself from costly repairs and guaranteed your engine's longevity.
Now, get back on the road with confidence, knowing your engine is running smoothly and efficiently.